
199 ☼ My Post-Shoot Workflow
How I Stay Organized and Sane After a Shoot
Dear friends,
After a big shoot, all I want is a snack, a shower, and a nap. But before any of that, there’s one crucial step I can’t skip: post-shoot workflow and file organization.
It’s not flashy, but it’s what keeps my time managed, my mind uncluttered, and my clients happy.
The Post-Shoot Ritual (Start to Finish)
This system took me years to build and refine, and it continues to evolve. But right now, here’s how I handle things from the moment I walk in the door after a shoot.
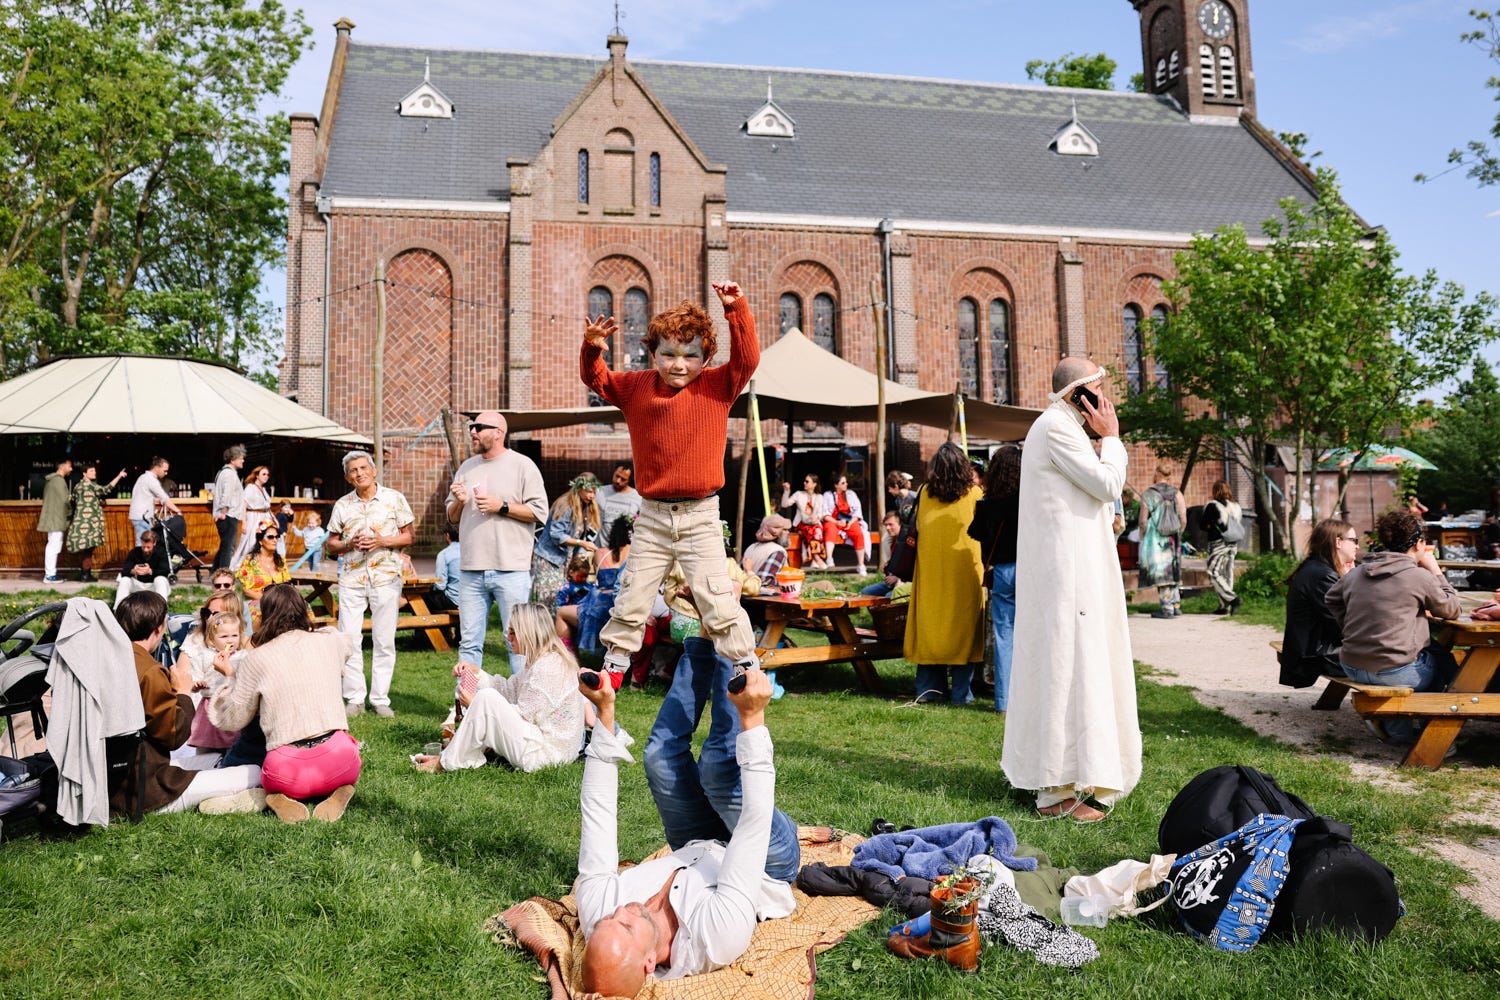
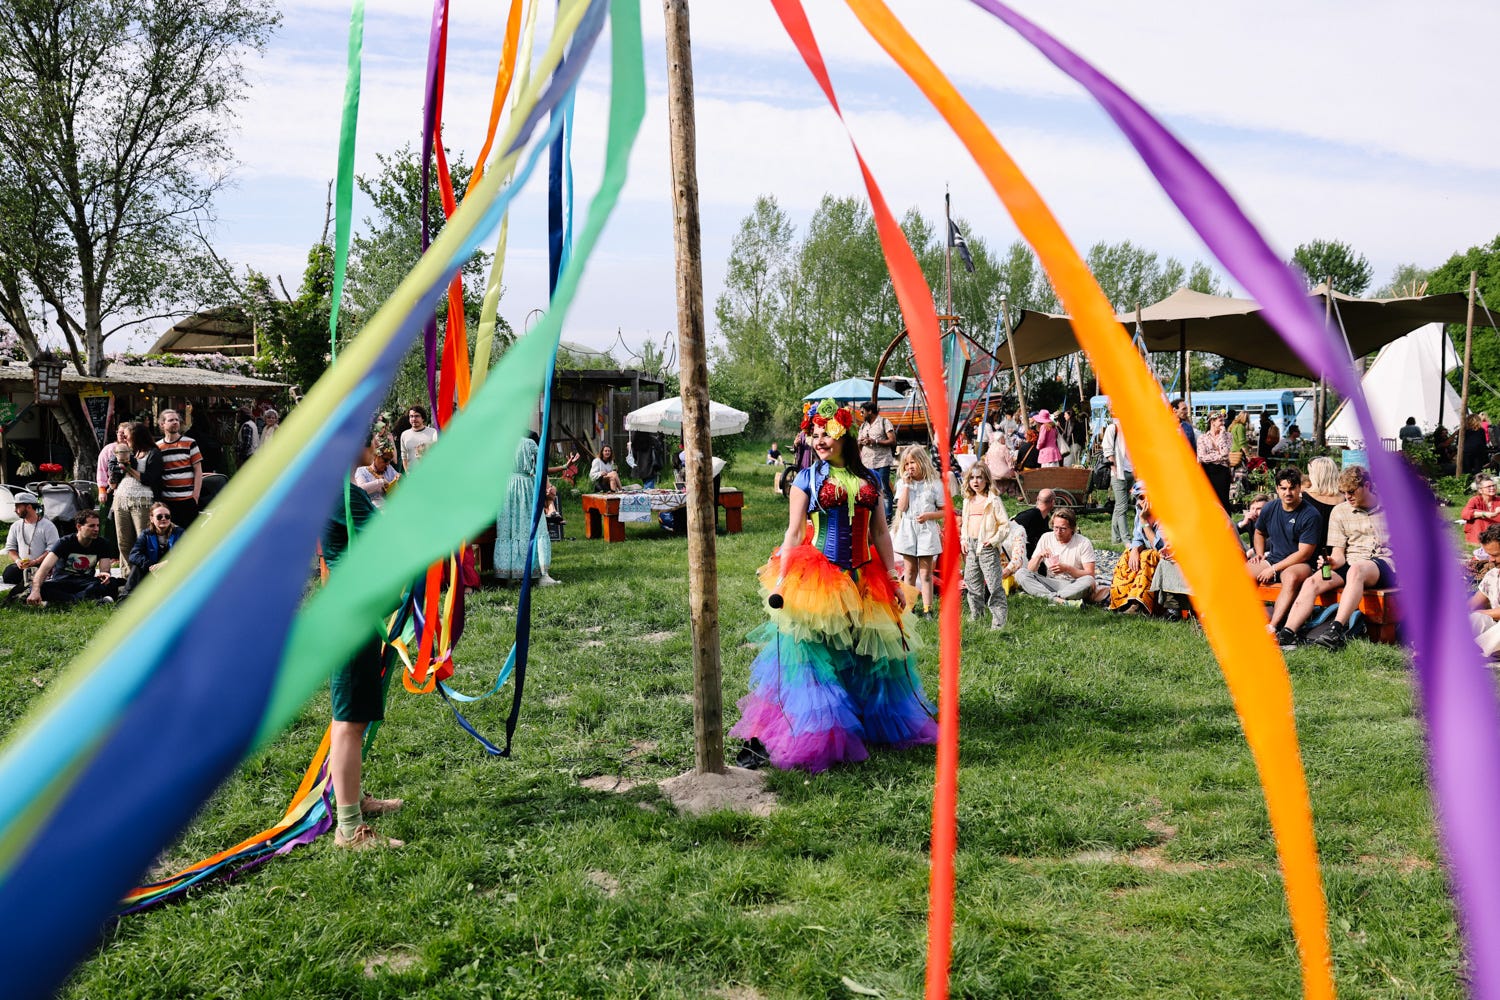
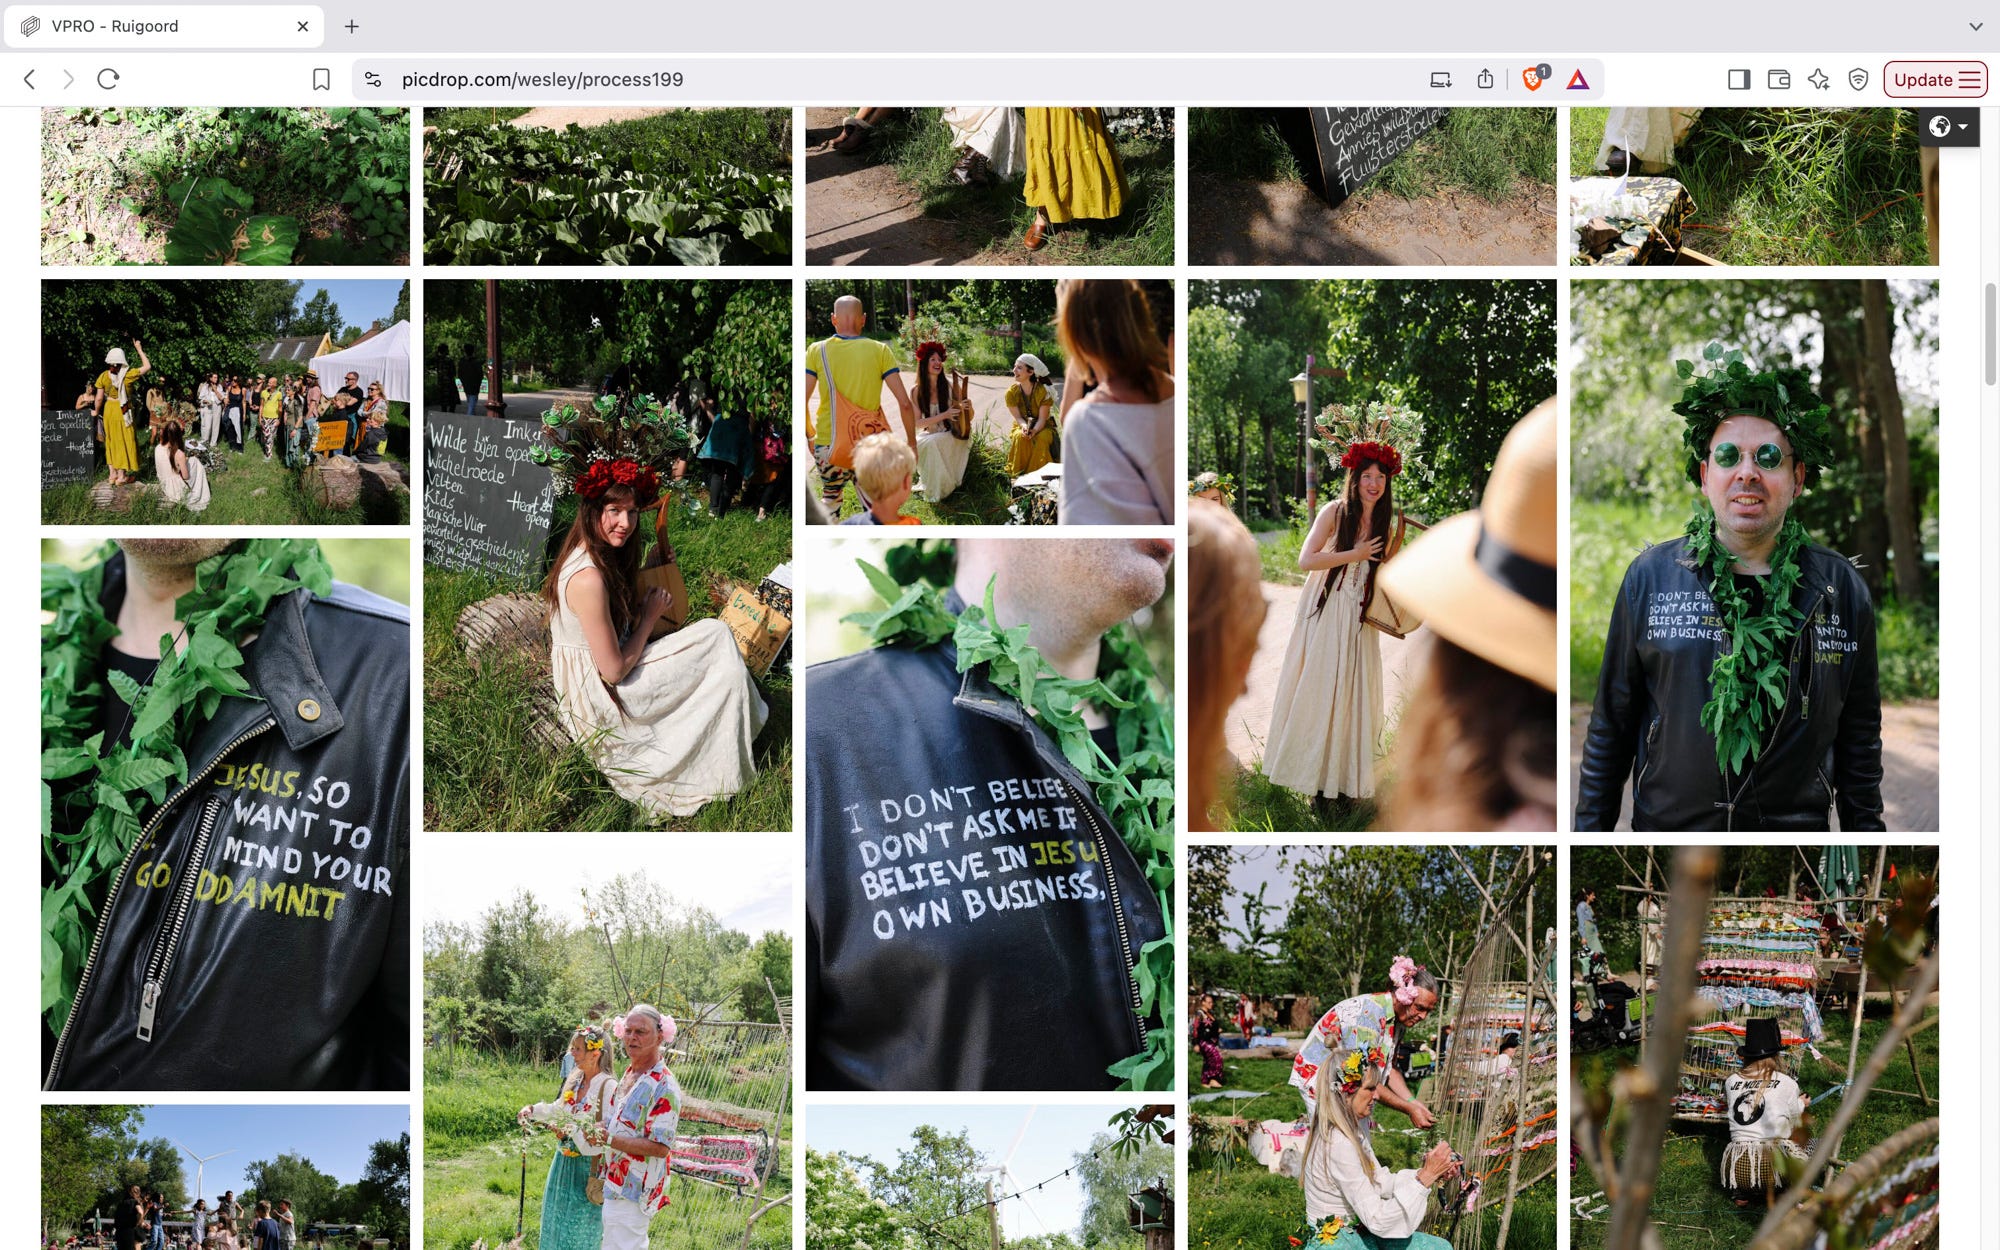
As our example I will use a recent editorial shoot for VPRO Magazine, and I’ll share pictures from it through out this issues to break up the text a bit.
Step 1 — Start with Clear, Clean Folders
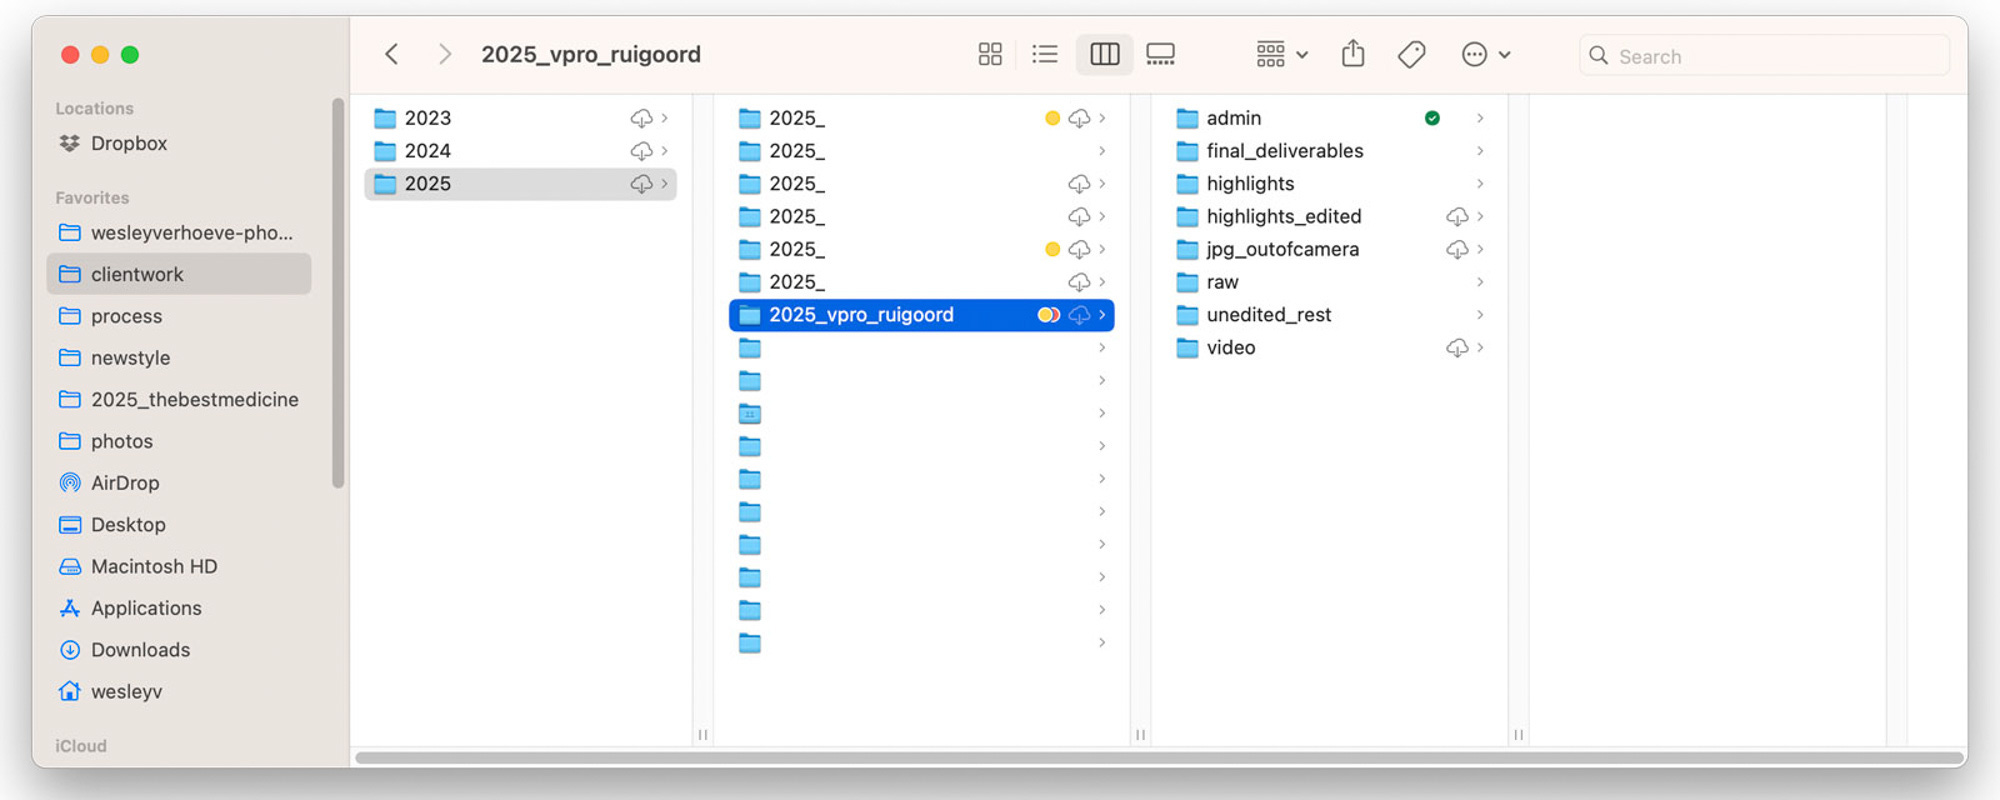
As soon as I get home, I dump the images from my memory cards onto my laptop into a new folder named like this:2025_CLIENTNAME/
Inside that folder, I create these subfolders:
RAW/(original untouched files)JPG_outofcamera/(for any in-camera JPEGs)
Then I label the parent folder with a status tag (like IN PROGRESS or FINAL) so I know where things stand at a glance.
These days, and brace yourself for some blasphemy, I often only shoot in JPG, because I work hard to get everything right in-camera. This way I don’t have to deal with RAW files that are heavy and slow. Haven’t had an issue yet! (Knock on wood!)
Step 2 — Backup, Automatic and Redundant
A program called Carbon Copy Cloner automatically backs up the new folder to my main external drive. Once the final set is ready, I also upload them to Dropbox and Backblaze. Once a month, I back up that external drive to a second one I store off-site.
Each of these pieces of software are paid services, so if this feels like overkill or too expensive to you, just manually drag your folder to a second drive. Just, for the love of all that is holy and unholy, save your stuff twice: once in the cloud and once where you can actually touch it.

Step 3 — First Pass: Let Go Early
I go through all the RAWs (or JPGs) using either Excire or Adobe Bridge.
If I’m using Excire, I have it auto-flag images that are exact or near duplicates to remove those. I do the same for portraits with closed eyes. This saves time, especially with large group portrait shoots. If I’m in Bridge, I go through it manually.
During this pass, I delete anything obviously unusable: out-of-focus shots, weird expressions, accidental frames, or duplicates.
Yes, I actually delete them. Some people say keep everything. And for personal work, maybe. But for client shoots? If someone is caught mid-blink or it’s a soft blur mess? Delete!
Step 4 — Second Pass: Highlights Folder
From what’s left, I pick the strongest, most useful, and most "me" images. These go into a folder called:
HIGHLIGHTS/
I give them a quick edit and export as hi-res JPEGs to a new folder:
HIGHLIGHTS_EDITED/
Step 5 — Everything Else: Unedited Rest
The rest of the usable images (but not top picks) get exported as untouched low-res JPEGs to a separate folder called:
UNEDITED_REST/
That way the client sees more choices, great for facial expressions or group dynamics, without me needing to polish 200 images.

Step 6 — Create the Client Gallery
I upload two sub-galleries for the client to review. I upload both of these galleries to my picdrop account, a new service in my workflow, more about that in Step 7.
Highlights – lightly edited, my personal top picks
Unedited Rest – the full batch of extras, unedited
The client gets an email explaining the difference and asking them to pick favorites (based on our agreement: 10, 25, 40 images, etc). I remind them that Rest images are indeed unedited and just for selection purposes, and that they’ll be cleaned up in the final edit.
Step 7 — Final Edit + Delivery
Once the client sends their selection over to me, I edit those fully and save locally them to: FINAL_DELIVERABLES/
I replace the working folder on my external drive with this final version and replace my previous uploads to Dropbox and Backblaze.
For over 10 years, I sent final deliverables to clients using WeTransfer. But after their acquisition last year and the layoffs of 80% of their staff, the product quality dropped noticeably.
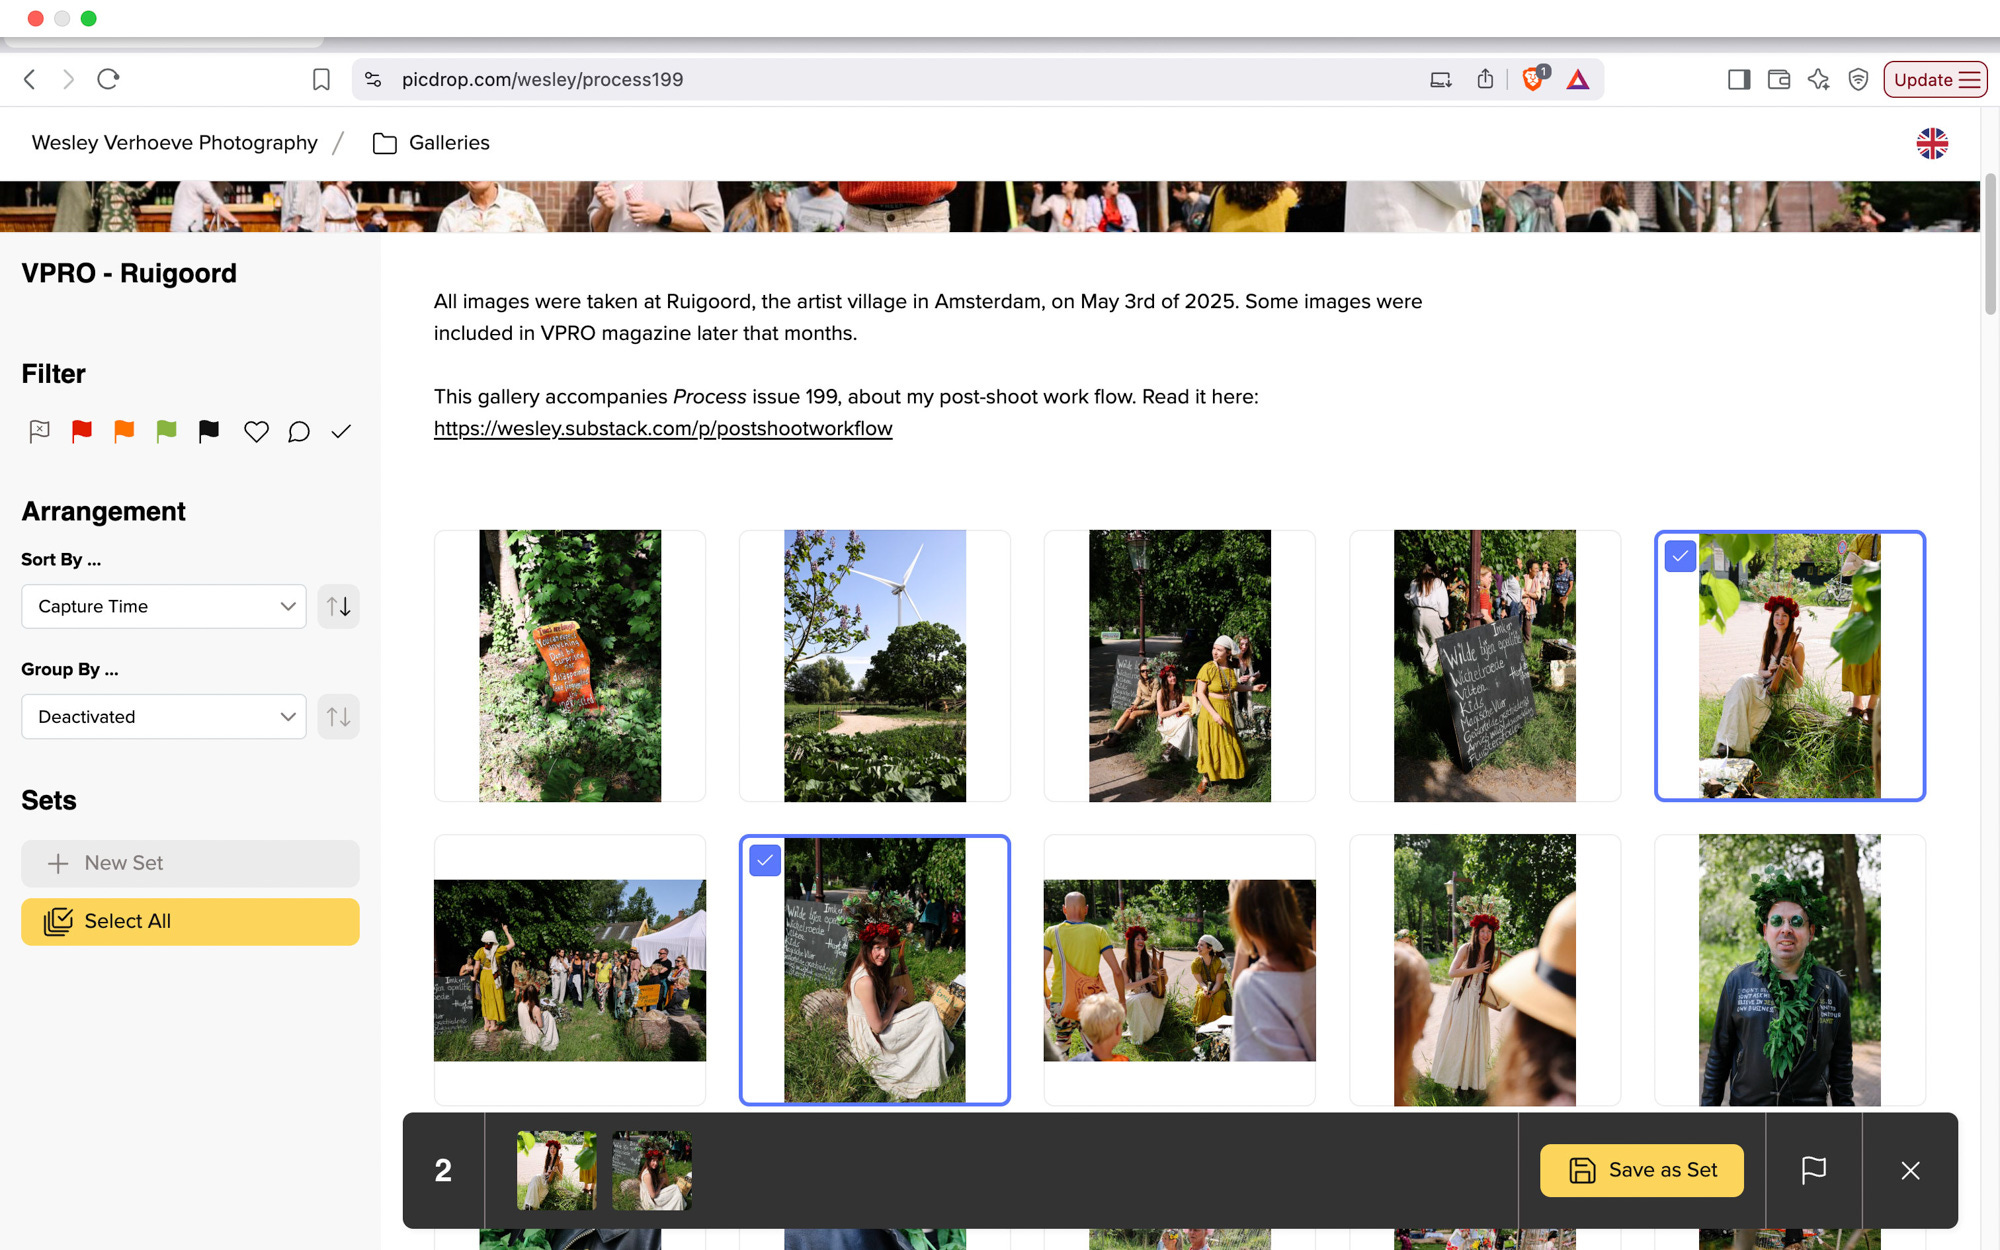
While trying out different alternatives to replace them in my workflow, the team at picdrop reached out. I tested their platform, genuinely liked it, and it’s now part of my regular system. It’s faster than the other services I tried and fits neatly into both Step 6 (client selection) and Step 7 (file delivery).
Here’s what a gallery looks like in “collaboration mode,” where your client can “like” or flag images, make one or more sets of selects, and more. Screenshot below:
And here’s the same gallery in “presentation mode,” ideal for just showcasing the work in a clean way:
Using picdrop has simplified my process and saved me time. It feels like a better fit for how I work than what I did before. It’s a tool with a free tier and flexible paid plans depending on what you need, though I would say it’s best suited for working photographers and other creative professionals and teams who work with images. Probably a bit overkill if you’re just casually sharing a few files here and there.
After using the product myself and chatting with the team, I felt this was a great thing to recommend and stand behind, so I also accepted a sponsorship for Process, which now allows me to offer you something extra:
If you sign up via this special Process link or use the code “Process” before August 31st, you’ll get a 2-month free trial and be entered into a giveaway for one of 3 free picdrop accounts (valid for a full year).
Step 8 — Invoice + Archive
After final delivery it’s time to create the invoice and send it over so I can get paid for the work I did. I use a Dutch invoicing software called MoneyBird, but you can also just make your invoice in a free spreadsheet or writing service like Google Docs.
After I send the invoice, I log the project in a simple Notion sheet. Here’s an example of the VPRO Gids shoot:
Project name: VPRO Gids — Ruigoord
Client name: VPRO
Date delivered: 2025.05.18
Image count: 829
Final deliverables image count: 2
Backup status: Backed Up
Invoice number: 2025_026
Not fancy, but so helpful if I need to look it up quickly.
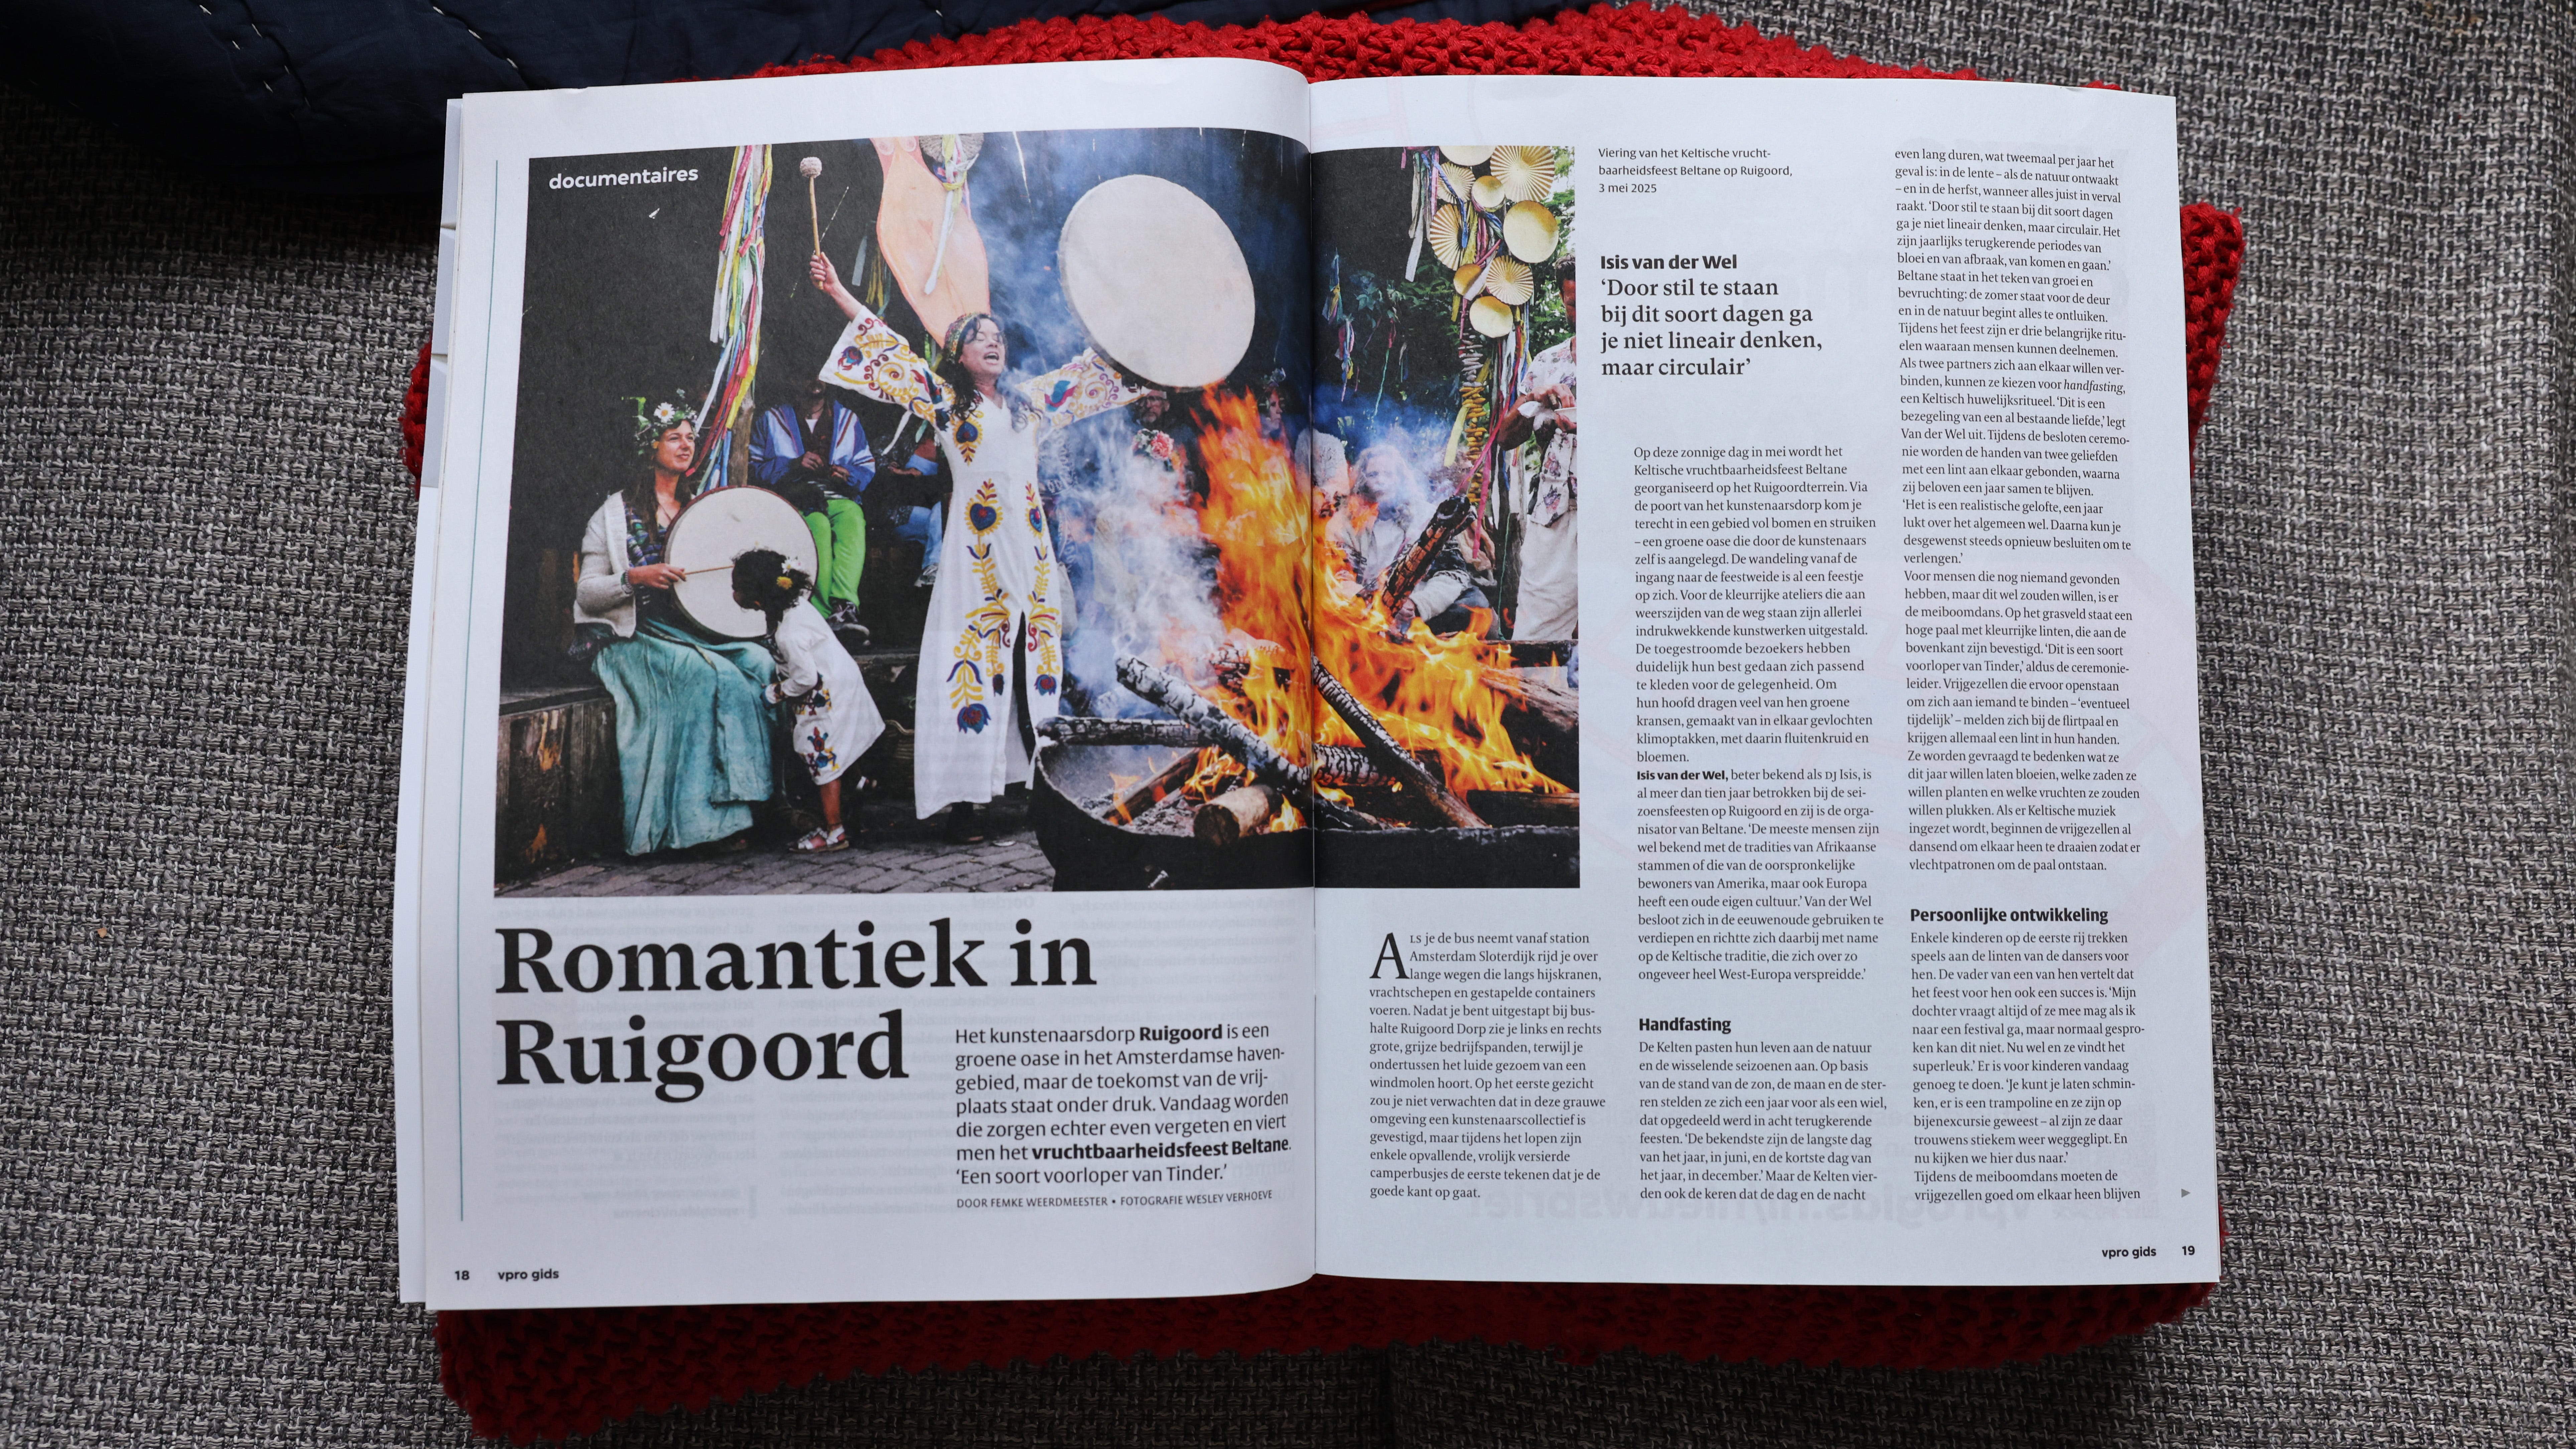
The editorial team ended up selecting two images to use in the magazine, rather than only one which was the original plan, which is always a win! Here’s the lead image, in use in issue 22 of the VPRO Gids.
Why Bother With All This?
Because the shoot is only part of the work. The real impact comes from what happens after: keeping things organized, making strong visual calls, and giving clients a smooth and thoughtful experience.
This system protects my brain from mental clutter, serves my clients, keeps my work safe, and helps me stay creative without getting bogged down in chaos.
If you’re building your own workflow, don’t worry about copying every step. Just use this as your inspiration to build a workflow that best suits your brain and budget and needs, and take it one piece as a time so it doesn’t overwhelm you.
To check out the full gallery from this shoot click here or on the button below.
Your Turn
If your workflow ever feels chaotic or like you’re reinventing the wheel each time, pick one part to tighten up this week, for example:
Standardize how you name your folders.
Set up a simple backup routine.
Make a checklist for client delivery.
This applies to personal shoots too. Just because it’s not paid work doesn’t mean it doesn’t deserve structure.
Future you will thank today you for it, trust me. Small tweak can lead to big clarity.
Reply in the comments and share: what part of your post-shoot process do you want to improve? Let’s learn from each other, in public.
Thanks for reading. If you enjoyed this issue, I’d love for you to share it with a friend.
Let’s keep shooting, learning, and sharing together—one messy, human step at a time.
Warmly,
Wesley
📷 What I Used This Week
People often ask what I’m using and here’s this week’s setup:
Camera: Canon EOS R5 and the Canon RF 24-70 mm f/2.8 L IS USM lens..
This issue is supported by MPB.com — my go-to for buying, selling, or trading used photo and video gear. Everything comes with a 6-month warranty, and their support helps keep Process going.

Lab: My film is processed by Carmencita Film Lab. I trust them fully for both their work and their humanity. Use code "PROCESS" for a free upgrade on your next order.
Next Week
It’s the 200th issue of Process (!), and I’ll be reflecting on what I’ve learned from writing and publishing this newsletter.
What’s worked, what’s hard, and why it’s worth it. I’ll also check in on my 2025 goals at the halfway mark, share news about the upcoming Process Workbook, Volume Three, and reveal the brand-new Process redesign by my friend and trusted collaborator Maxwell George.
Support Process & Elevate Your Photography
If these Sunday issues give you something—energy, motivation, a new way of seeing—you can support Process by picking up a book or joining the Process Photo Club.
Process Workbook Volume One & Two: Creative prompts and assignments designed to get you out of your head and into action with your camera.
€8.99 each (free for Process Photo Club members)
NOTICE Journal, Volume One: A fresh perspective on beauty and rebirth, shot in Amsterdam.
€40 (or €20 for Process Photo Club members)
📚 Order here and you help keep Process accessible to all.
🗃️ Browse the Process Archives.
📜 Read the Process Manifesto.
🚧 Currently Working On1
Currently Working On / Project Updates (r = release date)
Process Redesign — Coming next week!
NJV1 Exhibition — Currently on display at FotoFestival Naarden
Process Workbook, Vol. 3 — Selecting images (r: Jul)
Creatives In/AMS — Meetin with potential sponsors (r: Sept)
NOTICE Journal, Volume Two — Developing concept
25 in 2025 — Preparing for September shoots (r: Nov 7)
Wesley. You are an amazing shooter and really strong process hawk. Always learning from your articles and how you work. I think I have changed my folder organization every year as I keep tweaking folders and sub-folder sorting. I like your approach and it can help even a hobbyist hack like me.
I have similar processes for my concert shoots but use Lightroom and it’s smart folders there. It leans heavily on properly named folders/keywords and then ratings for picks. I have a folder save smart searches for keywords (or folder name) x with rating 1*-5*, that I just clone for each new concert (or trip or project or whatever). For each new shoot/concert, I just have to go in and change the keywords/folder names of the saved searches I just cloned.